Posts with tag: magnets

Step into the Lab: Unconventional Science Fair Project Ideas That Wow the Judges

Published: August 31, 2023 в 6:37 am

Author:

Categories: Experiments,The Physics

Tags: ,,,,,,

Are you tired of the same old baking soda volcanoes and potato batteries at science fairs?


If you’re looking to stand out from the crowd and impress the judges, it’s time to get creative and think outside the box! In this article, we’ll explore some unconventional science fair project ideas that are sure to wow both judges and audiences alike.

Quantum Physics and unconventional science projects will allow you to set yourself apart from the competition. Judges are constantly on the lookout for unique and innovative projects that challenge conventional wisdom. By choosing an unconventional project, you demonstrate your willingness to take risks and think creatively, which can leave a lasting impression on the judges and increase your chances of success.

Unconventional science fair projects ideas:

Select a topic that aligns with your passion and curiosity, as this will make the project more enjoyable and engaging for you. Additionally, consider the resources and materials available to you. Ensure that you have access to the necessary equipment and materials to conduct your experiment effectively.


  1. Magnetic Levitation (learn more here)
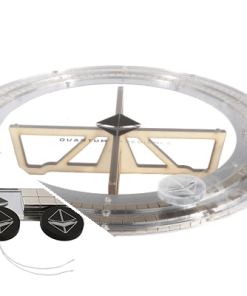
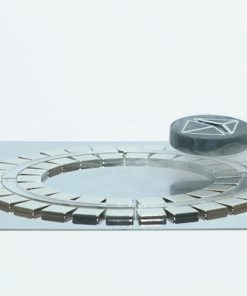
    Can we use magnets to levitate trains? What are the benefits of levitation and what are the limitations of magnetic levitation? Set up an experiment where you build your own magnetic track and levitate a magnetic train on top. Explore how properties of the tracks and train affect the frictionless motion, levitation height, stability and more. This project not only combines engineering skill but also explores the physics behinds levitation and potential impact of maglev trains on our society.
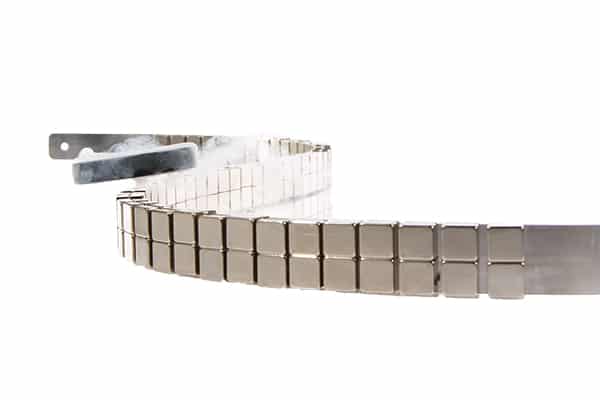
    Build your own magnetic levitation train model and explore the levitation properties (height, strength, stability).
    DIY Magnetic levitation train model.
  2. Superconductivity and Quantum Levitation (learn more here)
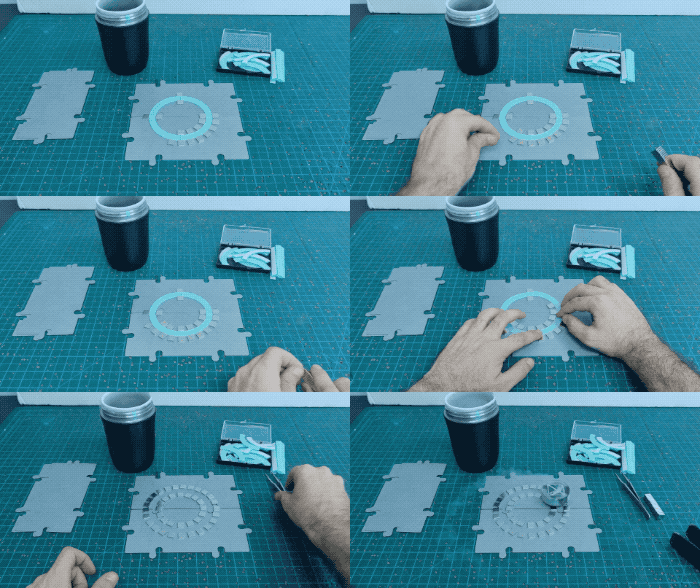
    The only quantum mechanics phenomenon we can demonstrate in real life. Investigate superconductivity and how it enables levitation and suspension in 3D by conducting multiple experiments with magnets and superconductors. Test the properties of superconductors at external magnetic fields and witness unique phenomenon like the Meissner effect and flux pinning. This project combines classical mechanics with concepts in modern physics.
    Build a magnetic track and levitate a superconductor above it.
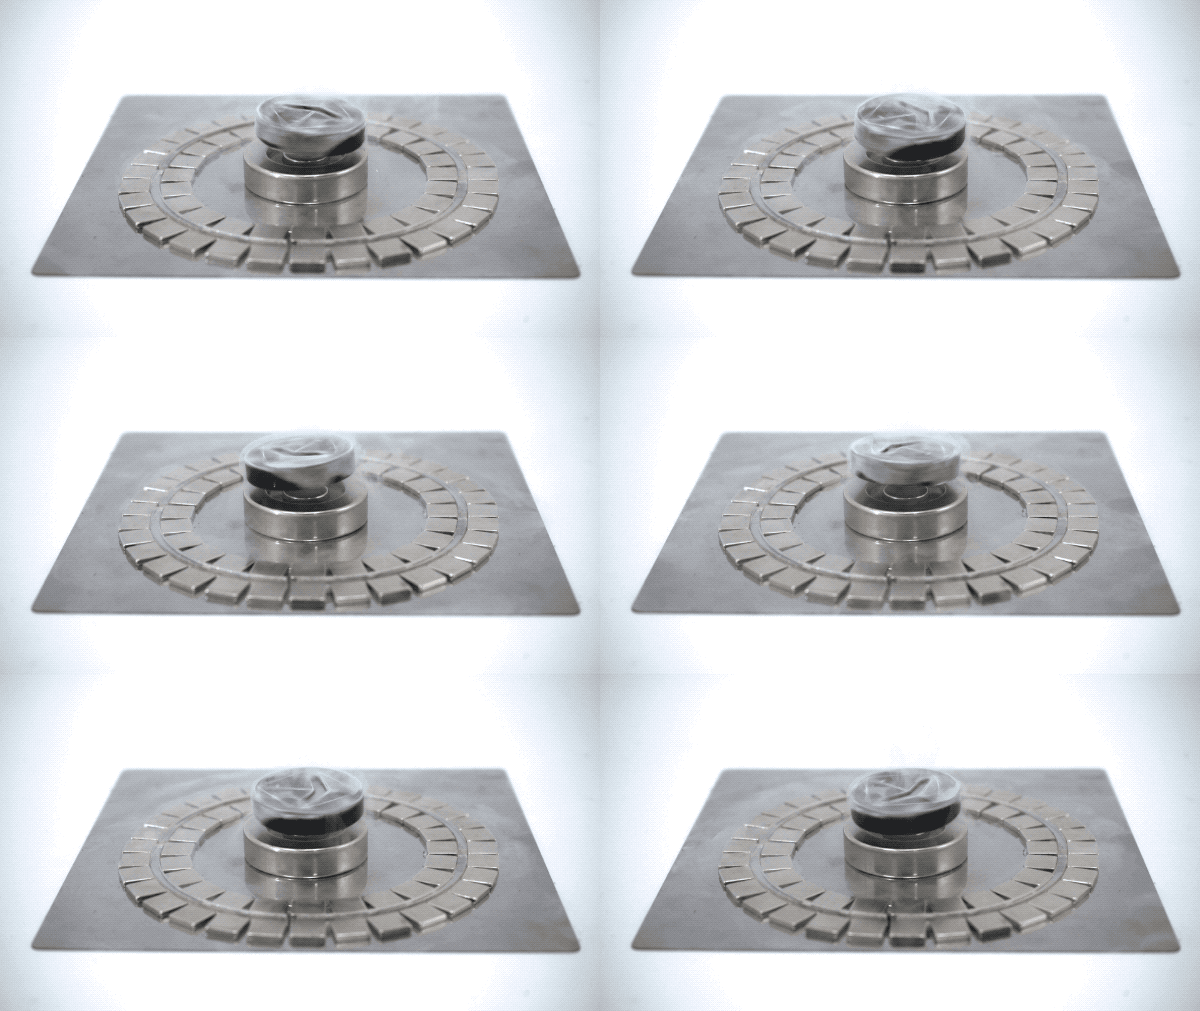
    Friction-less rotation of a superconductor above a ring magnet
  3. Magnetic forces – magnets and superconductors (learn more here)
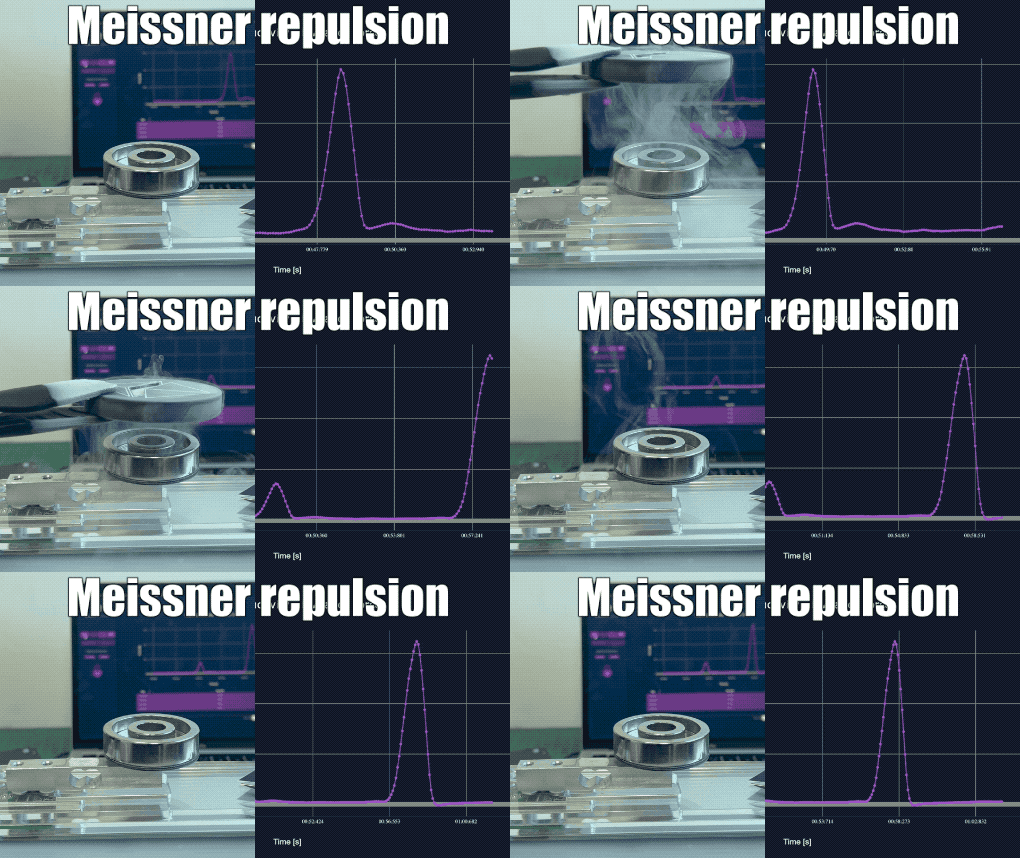
    Visualise and quantify the forces between magnets and superconductors. Using a digital scale you can conduct quantitive experiments of magnetic repulsion, attraction and even 3D locking. Investigate the uniquenss of superconductor magnetic levitation and suspension and compare it to ‘standard’ non-stable magnetic levitation. Perform a series of experiments to explore how the Meissner effect, flux pinning and magnetic repulsion/attraction behave with actual materials.
    Explore the repulsive forces between a superconductor and a magnet.
    Meissner effect and Flux pinning experiment


Gathering materials and resources

Once you have chosen your project idea, it’s time to dive into the research and planning phase. Start by conducting a thorough literature review to familiarize yourself with the existing knowledge and studies related to your topic.
Here (),  we’ve compiled several posts that will help you kickstart your project and guide you through the experiment.

Next, prepare a detailed research plan outlining:

  1. The steps you need to take to conduct your experiment.
  2. The materials and resources required
  3. The methodology you will use
  4. The variables you will control during the experiment.


Break down the experiment into manageable tasks and create a timeline to ensure you stay on track.


Safety above all else

It’s important to be mindful of safety precautions when gathering materials for your experiment.
Magnets can be harmful if handled without care. Keep the following rules when dealing with magnets:
  1. Remove any sensitive equipment (medical or electrical).
  2. Never leave a stray magnet without attaching it to a sturdy [metallic] surface. Magnets can “jump” into one another and cause great damage in the process.
  3. Keep magnets away from small kids. swallowing magnets is fatal and can result in injury and death.
  4. Always consult with a teacher, mentor, or experienced scientist to ensure you adhere to best practices. 
Liquid nitrogen is extremely cold – -196C, -321F. It can cause serious cold burns if touched directly. 
Use safety gloves and goggles and avoid direct contact with the skin.
 

General tips for a successful science fair presentation

To ensure a successful science fair presentation, consider the following tips:

  1. Practice your presentation multiple times to ensure a confident and smooth delivery.
  2. Use visual aids (live demo!) to enhance your presentation and engage the audience.
  3. Be prepared to answer questions from the judges and audience, demonstrating your knowledge and understanding of your project.
  4. Dress professionally and maintain good posture and eye contact throughout your presentation.
  5. Be enthusiastic and passionate about your project, as this will captivate the judges and audience.

Remember, the presentation is your opportunity to showcase your hard work and impress the judges, so make the most of it!


 

Good luck!

Economy superconductivity Levitation Kit

Economy superconductivity Levitation Kit

$119.00$309.00

Economy superconductivity Levitation Kit

$119.00$309.00
Includes
    • Quantum Levitator (YBCO superconductor inside), Ø3.5 cm, Ø1.4”
Magnetic Train Science Fair Kit

Magnetic Train Science Fair Kit

$79.00$179.00

Magnetic Train Science Fair Kit

$79.00$179.00
Includes
  • Track setup (perspex) + levitator plate
  • 70x NdFeB cube magnets (10x10x2Ø mm)
  • Stainless…
DIY Maglev Kit

DIY Maglev Kit

$499.00$749.00

DIY Maglev Kit

$499.00$749.00
Includes
  • Small / Medium Quantum Levitator
  • Plastic tweezers
  • 150/300 NdFeB block magnets (10X10X2mm3)

Magnetic Levitation Science Project

Published: June 22, 2023 в 12:58 pm

Author:

Categories: Experiments,The Physics

Tags: ,,,,,,

Why do we need levitating trains?

In order to move any object we need to invest energy and convert it to kinetic energy. Any object resists changes to its velocity depending on its mass. Heavier objects will require stronger forces to start moving (change their velocity) and hence more energy overall:


F – being the force needed to change the velocity (or create an acceleration) 

m – the object mass

a – the change in velocity of the object or acceleration. 

Even after a train reaches its desired speed we still need to constantly invest energy in order to maintain its velocity. The train “feels” resistance forces – forces that oppose its movement and try to stop it. Resistance comes from the air around the train & rolling friction acting on the wheels.

Wheel slip is one of sources of rolling friction that limits train speeds

Reducing friction

Regular wheeled trains are subject to rolling friction acting on the train wheels which limits its maximal speed to ~350km/h. In order to exceed this limit we need to get rid of the wheels and levitate the train. 

The easiest way to lift an object is through magnetic forces. Magnets (and electro-magnets) are a good source of repulsion forces. When we put two magnets close together, they either attract or repel each other.

However, magnetic repulsion is unstable – try levitating one magnet on top of another without support and see what happens. 

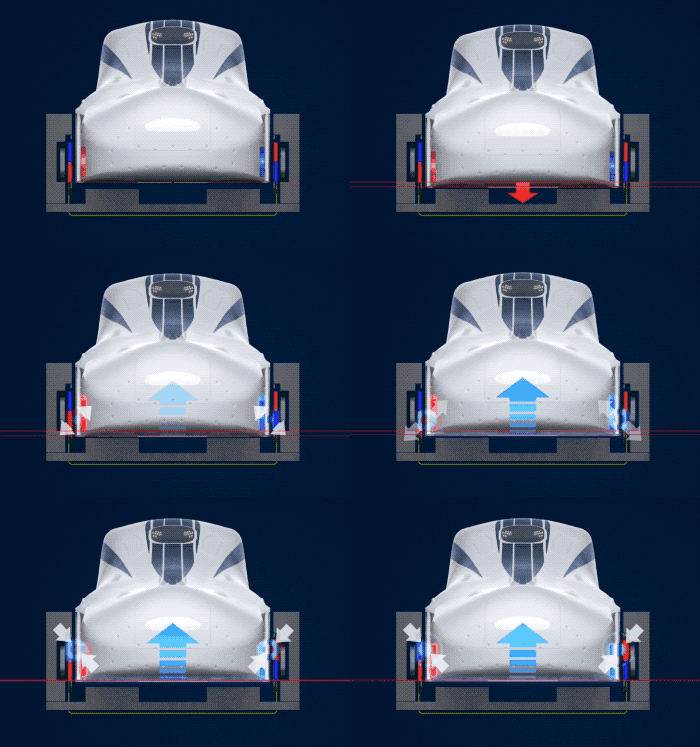
In order to create a stable magnetic levitation we need to create a stabilizing mechanism – a system that increases / decreases the magnetic forces when the train gets closer/farther away from the track. I.e  when the train is too close to the bottom track the magnetic repulsion increases, pushing the train back up and when it moves too close to one side of the tracks – a magnetic repulsion increases on one side and attraction forces on the other side, pushing the train back to the center of the tracks. 

Magnetic lifting and stabilizing forces Adapted from https://scmaglev.jr-central-global.com/ : In maglev trains, such as the Japanese Maglev (link), stability is achieved by inducing repulsive<->attractive magnetic forces in coils that are embedded inside the track.

Maglev Science Project

We can create a simple maglev train project by using permanent magnets for the levitation and add supporting walls for stability. Building such a maglev setup is a science experiment that will allow you to explore how magnetic forces behave, how to achieve levitation stability, friction and much more. 


Material needed:


      1. Magnetic steel plate, 7.5x30cm

      1. Perspex train cube w/ double sided adhesive

      1. Perspex spacers for the track

      1. 70 permanent cube magnets, 10x10x2mm

    Assembly instructions:

    Building the track

    Construct a straight magnetic track using ~60 block magnets and the magnetic steel plate:


        1. Place the wider Perspex spacer at the center of the steel plate. 

        1. Spread magnets on one side of the spacer. Make sure all the magnets a pointing to the same direction. 


      [TIP]

      Magnets will attract each other when stacked along the field direction. On the other hand – when placed side-by-side they will attract when having opposite polarizations. 


          • Fill in as many magnets as you can and tighten the line as much as possible. 

          • Build a second row of magnets having the same polarization on the other side of the spacer. 

          • Tighten the magnets in both rows as much as possible. 

          • Place the two narrow spacers on both sides of the magnet rows.

        Track holder & assembly


            1. Construct the track walls. Start with the two long pieces and connect them using the two shorter ones. 

            1. Place the track structure above the assembled track. 

          Magnetic train puck


              1. Remove the adhesive cover at the bottom of the train puck. 

              1. Place 8 magnets in two rows, along the long edges of the puck ~1mm from the edge.  
                Magnets should have the same orientation as the ones on the track.

            Flip the puck (magnets at the bottom) and place it above the magnetic track between the two Perspex walls. 

            Explore

            Experiment how different configurations and parameter affect the levitation:


                • What happens if the two magnetic tracks have opposite orientations*? 
                  Does it change the levitation stability? Height?
                  * make sure you flip one of the rows of magnets in the levitating cars as well.

                • What happens if the magnets closer to the edge?
                  Check the stability and levitation properties of the puck. 


                  • What happens if you use 4 magnets (instead of 8) for the puck? 

                  • Try placing the magnets at the corners /  in the center.
                    Find the optimal magnetic arrangement for the most stable levitation.


                    • What is the maximal weight that can be carried by the magnetic train?


                      • Measure the height of the levitation as function of weight. 
                        Put some adhesive tape on the top of the puck. Stack one/multiple coins on the tape. Make sure they are not magnetic! 
                        Using a ruler – measure the levitation height. 
                        Optional – plot a graph showing the height vs. weight. 
                        Is the relation linear? Can you give an intuitive explanation to curve shape?


                    Economy superconductivity Levitation Kit

                    Economy superconductivity Levitation Kit

                    $119.00$309.00

                    Economy superconductivity Levitation Kit

                    $119.00$309.00
                    Includes
                      • Quantum Levitator (YBCO superconductor inside), Ø3.5 cm, Ø1.4”
                    Magnetic Train Science Fair Kit

                    Magnetic Train Science Fair Kit

                    $79.00$179.00

                    Magnetic Train Science Fair Kit

                    $79.00$179.00
                    Includes
                    • Track setup (perspex) + levitator plate
                    • 70x NdFeB cube magnets (10x10x2Ø mm)
                    • Stainless…
                    DIY Maglev Kit

                    DIY Maglev Kit

                    $499.00$749.00

                    DIY Maglev Kit

                    $499.00$749.00
                    Includes
                    • Small / Medium Quantum Levitator
                    • Plastic tweezers
                    • 150/300 NdFeB block magnets (10X10X2mm3)

                    What Is Superconducting Levitation and How Does it Work? 

                    Published: December 6, 2022 в 4:48 pm

                    Author:

                    Categories: Experiments,The Physics

                    Tags: ,,,,,,

                    Ever wondered how Quantum levitation is possible? It’s all due to superconducting materials! These materials have special properties that allow them to conduct electricity without any resistance. When a magnet is placed near a superconducting material, the superconductor does two things at the same time – expel some of the magnetic field from its body (Meissner effect) and pin some of the field inside (flux pinning). This creates two effects: 
                    Magnetic repulsion – the superconductor “becomes” an opposite magnet and feels a repulsion force. 
                    Quantum Locking – locking of the superconductor in the surrounding magnetic field, preventing the pinned magnetic flux lines from moving inside the material.

                    How Does Superconducting Levitation or Quantum Levitation Work?

                    Superconducting levitation requires two conditions to be met in order for it to happen. First, the material itself must be cooled to temperatures well below room temperatures (around -163°C / -261°F). This is because all the superconductors we know of today, become superconductive only at low temperatures. Second, a powerful magnet must be placed near the superconductor. Initially, this causes electron pairs (Cooper pairs) within the material to start moving, and produce a magnetic field opposite to the external field, and as a result create magnetic repulsion. This is called the Meissner effect

                    A small magnetic ball is dropped above a superconductor. Its magnetic field is being expelled from the superconductor and as a result the ball is repelled from the superconductor.

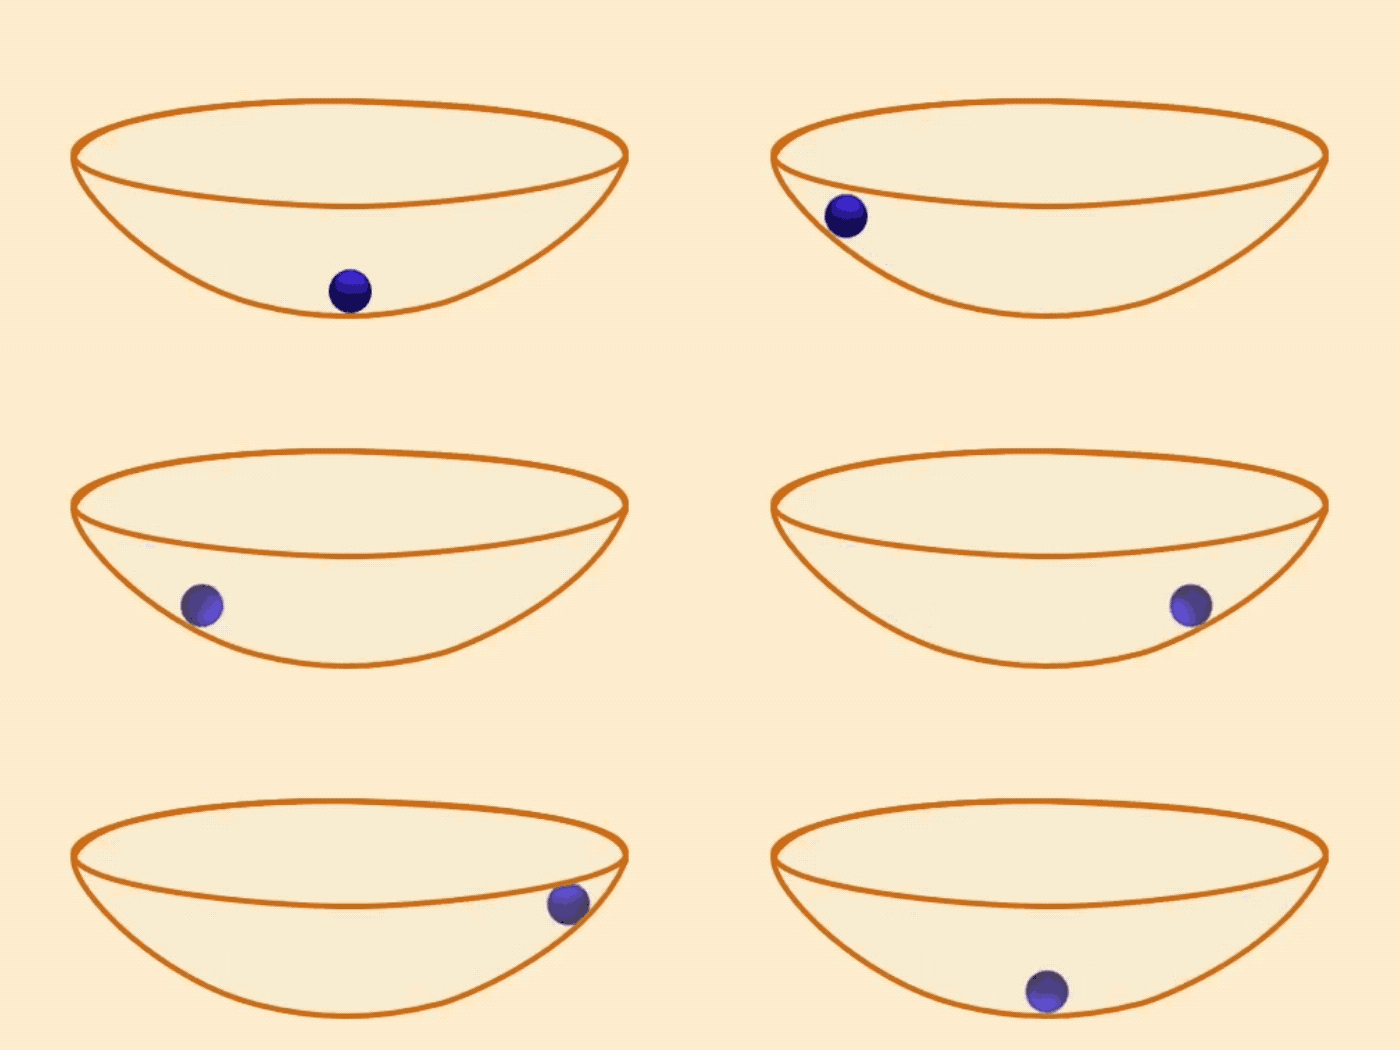
                    If the magnetic field is strong enough and the superconductor is of the right type (called Type II), the field will overcome the Meissner expulsion and penetrate the body of the superconductor. The magnetic field will enter the body in the form of discrete magnetic tubes or fluxons. The fluxons may get stuck in pinning centers – areas where superconductivity is relatively weaker, such as defects, grain boundaries, etc. This effect is called Flux Pinning. Any movement of the fluxons outside the pinning centers will cause the energy of the system to increase and will thus be followed by a force the tries to negate it. This is similar to a ball at the bottom of a bowl where any movement of the ball will increase its potential energy and will thus be encountered with a returning force towards the center. 

                    Discrete flux line (fluxons) shown from above as they enter a superconductor and get stuck in an array of pinning centers.
                    A ball feels a returning force inside a potential wall

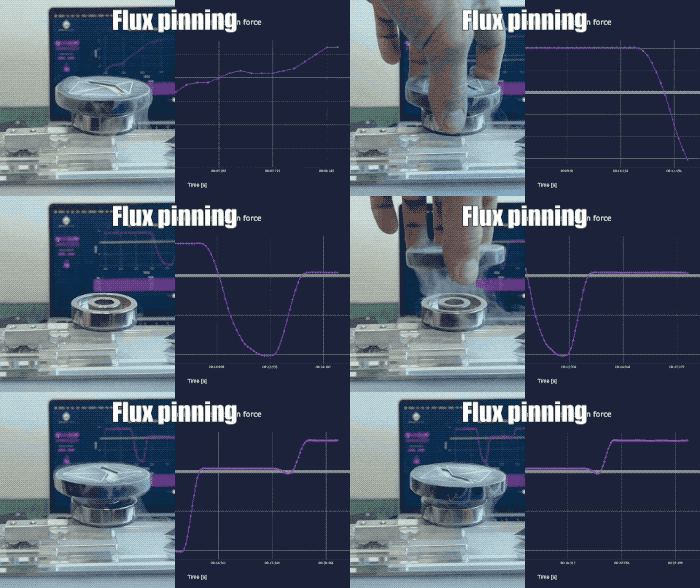
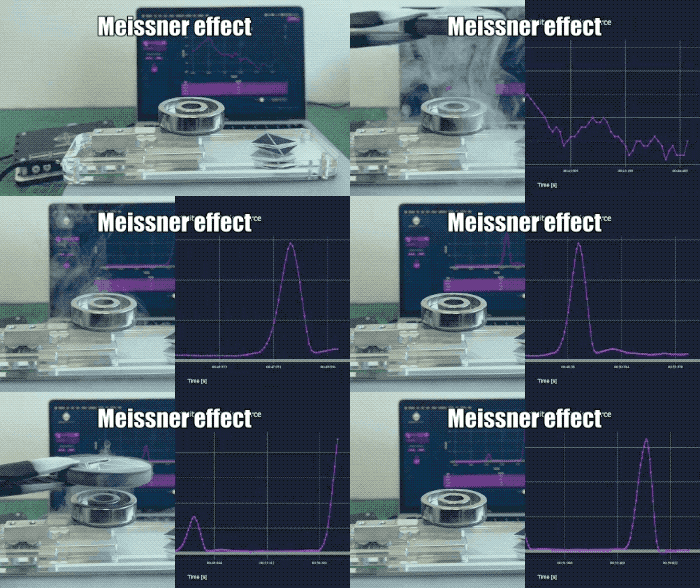
                    When the flux is pinned inside the material it locks the superconductor in place and we get the 3D locking effect. The superconductor can be frozen mid-air in any orientation and even be suspended below the magnet. We can distinguish between the Meissner repulsion and flux pinning with an easy-to-do experiment:

                    Flux pinning forces can be both negative and positive
                    Meissner effect repulsion force is always positive

                    Read more about these here

                    What determines the strength of the locking?

                    Superconducting Critical Current – Superconductors have one “card” in its sleeve – the ability to transfer currents without resistance. These supercurrents produce a magnetic field that interacts with the external field and are the source of the levitation and suspension forces. 
                    The maximal levitation force depends strongly on the maximal internal current a superconductor can transfer or critical current, I. A typical value of Ic in modern high-Tc superconductors is ~500A for a 1cm wide tape at liquid nitrogen temperatures (77K). The higher the critical current the stronger the levitation force.

                    External magnetic Field strength & gradient – Another parameter that affects the levitation force is the strength of the external magnetic field and its spatial gradient. The levitation forces stem from the energy changes when fluxons move inside the superconductor and in/out of pinning centers. The stronger the magnetic field the more fluxons are and the overall force needed to move them. Also, if the external field changes rapidly in space, having a strong spatial gradient, the fluxons will try to move when the superconductor is moved which will require a stronger force. 

                    A superconductor is locked mid-air in different orientations above a permanent magnet.