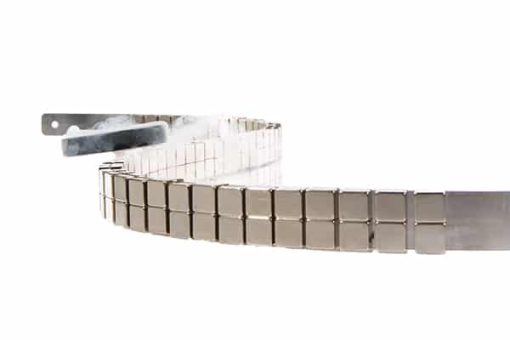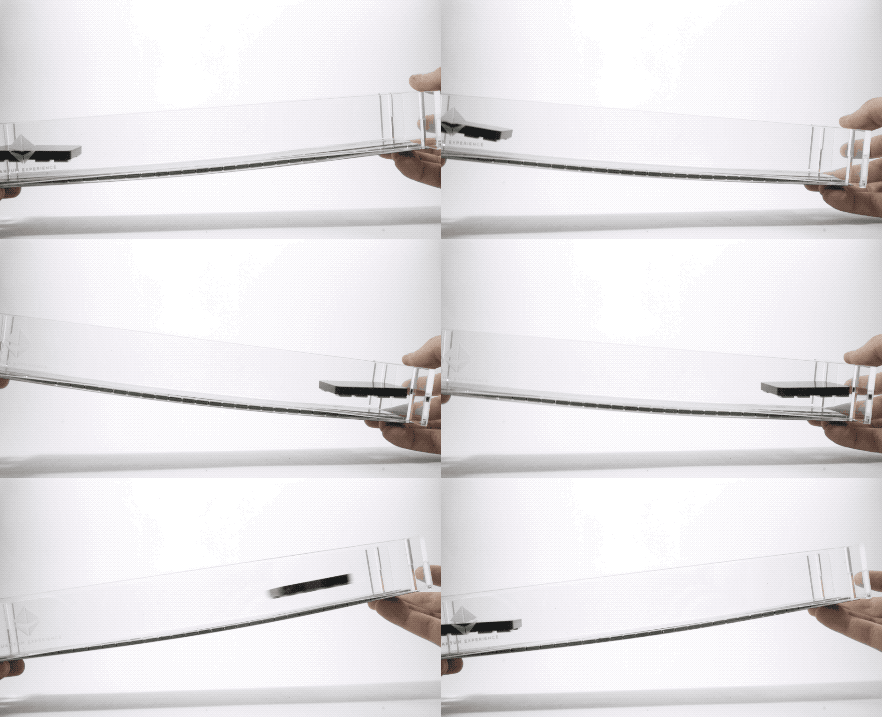
This project levitates a small train on permanent magnets alone — no liquid nitrogen, no cryogenic handling, no special safety kit. That makes it one of the few levitation projects you can build and demonstrate in an ordinary classroom. If you can get hold of liquid nitrogen, the superconductor hoverboard project shows genuinely stable levitation and tends to score higher with judges.
Why would anyone want a train that floats?
Moving anything takes energy. A train resists changes to its velocity in proportion to its mass, which is why a heavier train needs a bigger push to get going, and why that push costs more fuel. Getting up to speed is only half the problem, though. Once a train reaches cruising speed it still burns energy continuously, because resistance forces are constantly trying to slow it down.
Two forces dominate. Air drag grows sharply with speed. Rolling friction comes from the wheels themselves — steel wheels flexing against steel rails, bearings turning, and wheels slipping when the grip runs out. Wheel slip is the practical ceiling: past roughly 300 km/h, conventional wheeled trains start fighting their own contact patch more than the air.
Remove the wheels and you remove that ceiling. A train that never touches its track has no rolling friction and no wheel slip, leaving only air drag to overcome. That is the entire argument for magnetic levitation, and it is the argument your project is demonstrating.
Why magnets alone refuse to hold still
Magnets are the obvious way to lift something without touching it. Put two magnets close together with like poles facing and they push apart hard enough to carry real weight.
The catch is stability. Try balancing one magnet above another and it will not simply hover — it flips, slides sideways and falls. This is not a matter of technique. It is a result known as Earnshaw’s theorem: a stationary object cannot be held in stable equilibrium by permanent magnets alone. Every position that looks balanced is balanced the way a pencil is balanced on its tip.
Real maglev systems solve this with an active stabilising mechanism — sensors and electromagnets that strengthen the field when the train drops and weaken it when the train rises, thousands of times per second. A classroom project solves it mechanically instead, with guide walls that physically stop the train escaping sideways while the magnets carry its weight.
That distinction is worth stating plainly in your write-up, because it is the single point most projects get wrong. Your train is magnetically supported and mechanically guided. It is not freely levitating. The only tabletop way to get true stable levitation without contact is flux pinning in a superconductor, which is a different experiment and needs liquid nitrogen.
What you need
- A magnetic steel plate, roughly 7.5 × 30 cm, to act as the track base
- About 70 permanent cube magnets, 10 × 10 × 2 mm
- A Perspex cube for the train body, with double-sided adhesive
- Perspex spacers to set the width of the track channel
- A ruler, adhesive tape and a few non-magnetic coins for the measurements
The magnetic train kit contains all of the above along with step-by-step assembly videos, if you would rather not source the magnets individually.
Building the track
- Lay the wider Perspex spacer along the centre of the steel plate. This sets the channel the train will run in.
- Fill one side of the spacer with cube magnets, all pointing the same way. The steel plate holds them in place while you work.
- Fill the other side the same way, keeping the polarity consistent along the whole run.
- Fit magnets to the underside of the Perspex train cube so that it faces the track with the same pole, producing repulsion.
- Add the guide walls either side of the channel, close enough to stop the train tipping out but not so close that they drag.
- Set the train down in the channel. It should float a few millimetres clear and glide with a light push.
One detail trips people up: magnets attract when stacked along the field direction, but two magnets placed side by side attract only when their polarities are opposed. If a section of your track keeps flipping magnets around as you lay them, the polarity of that row is fighting its neighbour — turn the row over rather than forcing individual pieces.
Experiments worth running
A track that floats a train is a demonstration, not an experiment. What turns it into a science fair project is measuring something and explaining the result.
- How much can it carry? Tape coins to the top of the train one at a time until it settles onto the track. That load is your levitation capacity.
- How does height vary with load? Measure the gap with a ruler after each coin, then plot height against weight. The line is not straight — can you explain why the force climbs so steeply as the gap closes?
- Does magnet count matter? Compare four magnets under the train against two. Does twice the magnet give you twice the clearance?
- Where does the energy go? Give the train a consistent push and time how far it travels. With rolling friction gone, what is actually slowing it down?
Presenting it well
Judges reward projects that answer a question rather than projects that perform a trick. Lead with the physics problem — friction limits how fast trains can go — then show your height-versus-load graph as evidence of how the magnetic force behaves. Be upfront that the guide walls are doing the stabilising work, and explain why Earnshaw’s theorem makes them necessary. That honesty reads as understanding, not as a shortcoming.
If you want to go further, flux pinning versus the Meissner effect explains how superconductors achieve the stability that permanent magnets cannot, and our science fair project ideas covers how to structure and present the finished board.